Monday, May 3, 2010

Spring Fling Freebie

After months of neglecting everything... and everyone... I have a new kit for you! My friend, Kat, wanted me to do a springy kit for her, so I told her if she picked the colors and name, that I would. Another huge kit, I hope some of you guys can use it!!!


You can download this freebie here.

Friday, January 15, 2010

Lover Tutorial


Supplies


Tube of Choice
I am using the amazing artwork of Ismael Rac which you must have a license to use. Please do not use his work without purchasing a license from AMI here.


Scrap Kit of Choice

I have used a gorgeous Pay to Use Kit, called On The Wings of Love by Susan from Shal's World, you can pick this kit up at Mistaken Art here.


Mask of Choice

I have used Weescotslass Mask 223. You can pick it up at her blog here.


Font of Choice

I am using a font called 1 Journeyman DNA, which you can pick up from DaFont here.


Additional Supplies.

You need Eye Candy 4 or its equivalent, which you can pick up at the Alien Skin website, here.


Now, Let's have some fun!


Let's begin by creating a new image 600 by 600 pixels.

Now let's open up our tube and Frame 8.

Drag the frame over to your new image.

It should center perfectly and that's where we will leave it.


Now, let's do the same with our tube.

Except layer it underneath your frame layer.
Open up Paper 6 and layer it underneath the tube layer.


We'll be using it for the frame's background.


Using your magic wand tool, select the inside of the frame.

Selections, Modify, Expand by 5.

Selections, Invert, Then hit delete on both your tube and paper layer.


Open up Glitter 3.

Layer it behind your frames background paper layer.

I left it centered, then duplicated and mirrored it.

Then merge down the two glitter layers.


Let's add some color to the background.

Open up Paper 12.

Add it as the bottom layer.Apply WSL Mask223.Merge group.

Now, isn't that pretty!


Let's add some alphas.

I have chosen to use the letters L-O-V-E-R.

Open up the letters you will be using and resize them all by 75%.

Arrange them on the bottom of your frame.


Open up Flower 2.

Resize it by 50%.

Add one and arrange it under the alpha.

Duplicate and then mirror the flower.


Let's add some glow!

Set your foreground color to #ffcce5 and your background color to #ff1981.

These will be the colors we will use in our glow.


BasicGlow Width - 3.00

Soft corners - 25

Overall Opacity - 100%

Draw Only Outside Checked.

Please refer to the pic below to get your settings right.


I have added this same glow to my tube layer and all of my alpha layers.
Add your copywrite layers.

Add your name and apply the same gradiant glow as before.


I hope you enjoyed this tutorial.

I would love to see your creations!

Please feel free to use my tutorial as a basic guideline and give it your own spin!!!

Monday, January 11, 2010

Valentines 2010 Freebie

I have, what I thnk is a gorgeous Valentine's Kit for you today. I really suck at previews..I know this, please give it a chance! *lol* I sure do hope you will! It is packed full of a whole lot of papers and some fun elements! You can download this wonderful freebie HERE!!!

An Award!!!

I have recieved this lovely award from Tiffany over at Sweet Southern Comfort Creations. Thank you so very much, Tiffany!!! I am going to re-gift this wonderful award to the following 5 blogs.


Shal's World

Tinabug Creations

Cowgirl Creations

The Life and Times of Leah

Belle of the Ball Tutorials and Scraps

Sunday, December 27, 2009

Woohoo.. A Tutorial Using my Starrified Freebie Kit


April from Cowgirl Creations has written a wonderful tutorial using my Starrified Freebie Kit!!! Isn't it just wonderful?!? Thank you so much, April!!!

Monday, December 21, 2009

2010 Tutorial


SuppliesTube of Choice -
I am using the amazing artwork of Ismael Rac which you must have a license to use. Please do not use his work without purchasing a license from AMI here.
Scrap Kit of Choice-
I have used a gorgeous Pay to Use Kit, called Ringing in 2010 by Susan from Shal's World, you can pick this kit up at MPT here.
Mask of Choice -
I have used Mask 7, made by Zuzanna. You can pick it up at her site, here.
Font of Choice -
I am using a font called LaPointe's Road, which you can pick up from DaFont here.

Now, Let's have some fun!

Let's start by opening up a new image, 600 by 600 pixels.
Open up your tube and Frame 6, or whichever other ones you will be using.
Drag your frame over to the new image, which will center it perfectly for you.
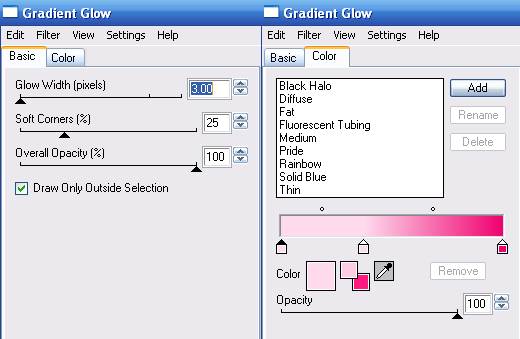
Add a Drop Shadow to your frame of of 0,0,100, 3, Color is Black.

Position your tube where you would like her under the frame layer.
Add a Drop Shadow to your tube of of 0,0,100, 3, Color is Black.
Duplicate her and move the duplicated layer above the frame layer.
Using your magic wand tool, click on the inside of the frame.
Selections then Modify then Expand by 10.S
elections then Invert, and press delete on the tube layer under the frame layer.Selections then none.
Using your magic wand tool again, but set it on freehand selection.
Select the parts of your tube on the top layer to have your tube as you want it.
I have selected everything but her head, so her head sticks out on the top of the frame.
Then hit delete on the top tube layer.
Selections then none.

Open up Star Curtain 3 or the one you are using.
Drag it over under your tube and frame layers, so that it is positioned behind them.
Add a Drop Shadow to your star curtain of of 0,0,100, 3, Color is Black.
Using your magic wand tool, click on the inside of the frame.
Selections then Modify then Expand by 10.
Selections then Invert, and press delete on the star curtain layer under the frame layer.
Selections then none.

Open up Paper 19 or the one you are using.
Drag it over under the star curtain layer.
Using your magic wand tool, click on the inside of the frame.
Selections then Modify then Expand by 10.Selections then Invert, and press delete on the star curtain layer under the frame layer.
Selections then none.

Let's get Party Hat 1 out, resize it by 50%.
And add it on top of our frame.
Place it somewhere around the bottom left corner.
Add a Drop Shadow to your hat of of 0,0,100, 3, Color is Black.

Now, let's use Party Horn 3.
Add it right uner the party hat.
We need to resize it by 50% and free rotate it to the left by 10%.
Add a Drop Shadow to your horn of of 0,0,100, 3, Color is Black.

Let's use Champagne Flute 3.
Add it right uner the party hat.
We need to resize it by 50%.
Add a Drop Shadow to your Flute of of 0,0,100, 3, Color is Black.

Let's add some balloons!
I am using Balloon 3.
Resize it by 75% and add it to the right side of the frame.
Then back on the balloon, free rotate by 10% to the left, and then add that one to your tag.
Back on the ballon again, mirror, and add that one to your tag as well.
This should give you a total of 3 balloons on your tag.
Arrange them how you would like them.
Add a Drop Shadow to your balloons of of 0,0,100, 3, Color is Black.

Let's put a bow on those balloon strings to make it a bit pretty!
Open up Bow 1.
Resize it by 25%.
Add it on top of the balloons, placing it around the bottom of the balloon that is showing.
Add a Drop Shadow to your bow of of 0,0,100, 3, Color is Black.

Let's use one of those beautiful beads!
I am using bead 5.
Free rotate it by 10% to the left and place it on top of the left top of your frame layer.
Add a Drop Shadow to your bead of of 0,0,100, 3, Color is Black.

We must do something with the plain background!
Let's get one of those lovely papers!I am using Paper 9.
Add it as the background layer.Let's apply our mask to it.
I am using Mask 7 made by the lovely Zuzanna.
Merge the group together.

Add your copywrites and your name and you're all done!

Hope you enjoyed this tut! I would love to see your results.

I recieved my first Award!!!

This is from WitchysHeart from Creationz by WitchysHeart.
Thank you so much, WitchysHeart!!!

I'm supposed to pick 10 blogs to pass this too,and list 10 things about me.


1. I live in North Carolina, but was born in Pennsylvania.

2. I'm actually very shy and won't talk to you unless you talk to me first.

3. I am on my second marriage.

5. I got married when I was 15 and was divorced by 20!

6. I have three children, the first came when I was 17...

7. I sincerely dread turning 30...which isn't but, a little over a year away...

8. I've been playing wiht PSP on and off for the past 5 years.

9. I love to learn new things and think everyone should learn something new everyday!

10. I hate dogs and much rather prefer cats, but due to a really bad experience with my last cat, Lucky(*cry*), I now own a fluffy pomeranian...


This is who I have selected so far. Seems alot of people have it... and I don't know that many people...
3.

Monday, December 7, 2009

Grinched Freebie


I have another new kit. This one is called, Grinched. It uses an array of grungy colors and was not meant to be the perfect Christmas kit..but more of an anti-Xmas kit! *lol* I love it, myself, and hope you do too. The preview does not do this kit justice at all, so download it, and see for yourself!


You can download this freebie, HERE.

Thursday, December 3, 2009

Starrified Freebie

I have another freebie for you today, entitled, Starrified! It's packed full of all kinds of starry things for you to play with! I hope you enjoy it!

You can download this freebie HERE!

Blue Christmas Tutorial

Supplies


Tube of Choice - I am using the amazing artwork of Ismael Rac which you must have a license to use. Please do not use his work without purchasing a license from AMI here.


Scrap Kit of Choice - I have used a gorgeous Pay to Use Kit, called Holly Jolly Christmas by Susan from Shal's World, you can pick this kit up at MPT here.


Mask of Choice - I have used Vix Mask 424, made by Vix. You can pick it up here.


Font of Choice - I am using a font called Black Chancery, which you can pick up from DaFont here.


Now, Let's have some fun!


Open up a New Image 600x600 pixels.Open up the tube you will be using.Open up the frame as well, I am using Frame 3.


Drag the frame into the new image you just made and close out the original.Add a Drop Shadow to the frame of 0,0,100, 3, Color is Black.


Also, drag you're tube over. I left mine centered, but you can move yours around where you want her.Add a Drop Shadow to your tube of 0,0,100, 3, Color is Black. Duplicate your tube and place the duplicated tube above the frame.


Go back to your frame layer. Using your magic wand tool, click on the inside of the frame.
Hit Selections, Modify, Expand by 5. Selections and then Invert.On your bottom tube layer, hit the delete button. Select None.


On your top tube layer, using your magic wand tool again, except this time have it set on freehand. Select the bottom of the tube that we don't want sticking out and hit delete, then select none.


Open up a paper of choice. I am using Paper 7. Arrange it underneath your tube layers and the frame. Using your magic wand tool, hit the inside of the frame. Selections, Modify, Expand by 5. Selections then Invert. On your paper layer, hit the delete button. Selections none.


Let's go ahead and add a background layer. Open up another paper of your choice. I am using Paper 22. Arrange it as your background layer.


Let's apply a mask to this layer. I am using the wonderfully gorgeous Mask 424 made by the very talented, Vix. Just apply the mask and then merge the group together.


Let's add some of the Ribbon Wrap. I am using Ribbon Wrap 3. Let's resize it by 75%. Place it on top of the right corner of the frame. Make sure it is under the top tube layer. Add a Drop Shadow to your wrap of 0,0,100, 3, Color is Black. Duplicate the wrap. Then, Image, Mirror, Image, Flip.


I want to add a bit more color. So open up Ribbon Curl. I am using Ribbon Curl 6. Free rotate it by 15. And place it under the frame layer in your tag. Duplicate,and then mirror. Merge down. Duplicate and then flip, and merge down again.


Let's decorate a bit. Open up some ornaments. I am using Ornaments 2 and 3.Free rotate the ornament 15 to the left and then resize by 60%.Place it in the left corner of your frame and add a Drop Shadow to the ornament of 0,0,100, 3, Color is Black.


On your other ornament, Free rotate it by 15 to the right and resize by 50%. Place it on top of the other ornament, and add a Drop Shadow to the ornament of 0,0,100, 3, Color is Black.


Add your copywrite information to your tag.


Now, just add your name, merge visible, and then your all done!